Showing posts with label Crafty. Show all posts

Thursday, January 19, 2012

Printable Door Sign: Yes, We Can Play/Sorry We Can't Play

We live in an awesome neighborhood.  I love our neighborhood.  There is a good mix of young, middle, and older families, people are so kind and friendly, and there are so many kids in the neighborhood to play with.  I love that we live on quiet street and I can send the kids out to ride their bikes or walk to the bus stop without worrying every second because even if I run into the house to get something, the neighbors watch out for my kids, too.  Everyone is out walking, playing, riding bikes all the time, and it's really idyllic. 

Because there are so many kids to play with, we get very frequent knocks on our door, at all times of the day.  And while I hate to turn the kids away when we can't play, sometimes we can't play.  But I also don't like discouraging the kids because the more they are told no, the less likely they are to come back when my kids can play. Shelli told me once about putting a stop sign on her door to let the neighborhood kids know when they can't play, so I decided to make one of my own. 

The stop sign for when kids are napping, we are eating dinner, the kids are doing their chores, or we are having family time. 

The go sign for when the kids are free to play. 

I printed the go sign on the back of the stop sign, then laminated it (with the nifty new laminating machine I got for Christmas!) and punched holes in it to hang on Command hooks.  The kids flip the sign when they get home from school, or when they finish their chores, etc.  I originally attached magnets to the first one I made, but my door ended up not being metal, so I used the hooks.  Also, we've had this sign hanging on our door for months now, way before I got my laminating machine.  I just slipped the page into a page protector and hung it from the holes on that.  When it gets windy it tends to blow off the door, so we've bent the hooks up a little to prevent that. 

I've gotten lots of compliments about our door sign for the neighborhood friends, so I thought I would make it available for all of you who might want it in easy-to-print format.  Click on the links below to download and print the PDF.  This is no professional piece of graphic design, keep that in mind.  If I was going to take my time to do it right it would not be pixelated at all, and the colors would be consistent and even, etc.  But I think it's better to actually get it up here than never do it because it isn't perfect.  Maybe one of my more design-talented friends would like the project.

Click here to download the stop sign

Click here to download the go sign

Thursday, June 2, 2011

Gak

Looking for a fun project to do indoors while it's 100+ degrees outside?  Oh, it isn't 100+ degrees outside where you are?  Well, lucky you.  But here, sometimes even playing in the water isn't worth hanging out outside for, so we came up with something fun to do when our cousins were over playing: gak! 


Here's a link to the recipe and directions.  It's pretty fun to play with on it's own, but our suggestions for a fun time: a pack of army men and/or plastic bugs or animals from the dollar store and some cookie cutters.  The kids played with this for a very long time, and when they were done, we put it into the fridge in Ziploc bags and saved it for the next day. 

Tuesday, October 12, 2010

Nesting Project #10: Cloth Diapers


Okay, this deserved it's own post, if only because it has consumed my thoughts for months now.  I'm going out on a limb here, because I think I've already revealed myself as an obsessed mommy.  But I'm going to share anyway, partly so I can have a record of it, and partly so I can let out some of my excitement. 

When Isaiah was a baby, I had online friends who cloth diapered, and I thought it was sooo cool (so great for the environment, and those diapers are super cute!) and a great way to save money, long term.  But way more work than I could ever handle.  I read a whole bunch about it, and then pushed it to the back of my mind because I knew I would be laughed at by Adam and probably everyone else I knew "in real life" if I ever showed serious interest in it.  Fast forward a couple of children and a handful of years, and here I was, pregnant again, and reading online (again) about other women cloth diapering their babies.  And I was so jealous.  I did a bunch of research (a lot can change in a few years, and I was pretty sure I could handle the extra work now), and I mentioned it to Adam, in an "isn't this cool" kind of way.  He humored me, which was sweet because I know he thinks my green-ness is a little . . . weird, maybe.  Or maybe just unnecessary. 

And then a couple of things happened.  One, my sweet sister-in-law, Molly posted on her blog about cloth diapering.  And two, while I was perusing Craigslist I came across a listing for cloth diapers that was a total steal--the deal of the century!  And after crunching the numbers and presenting them to Adam, I bought them.  And I started a new hobby, as Molly called it.  Because that's really what it feels like: something fun to think about and buy and do, never mind the fact that it has to do with poop. 

With the excellent advice that I start with Max to see if I really liked it (and could stand it), I ordered some cheap one-size pocket diapers in July, and started out with him.  Since then I've tried a few different types and brands of diapers, and am learning what I like best.  And just in the last week, Lily has gotten big enough for her smallest all-in-ones and is wearing some homemade fitted diapers with covers. 

She's an excellent diaper model don't you think?  This is one of the fitted diapers I made. 

My thoughts so far?  Cloth diapering newborns is way easier and less gross than toddlers.  But even toddlers can be fun.  There is something so cute about Max picking out what color diaper he wants, and then toddling around with his fluffy bum.  Now if I can refine my wash routine to eliminate detergent build up, I'll be all set . . .

Nesting Projects #6, #7, #8, & #9: High Chair Cover, Crocheted Beanie, and Headbands and Flower Clips

Today was Lily's due date, and in honor of passing this day with a 2-week-old in my arms, I thought I'd post the some of the nesting projects I never got to post before she was born.  Believe me there were more, but I'll spare you and just show you my favorites. 

High chair cover before:


High chair cover after:
I got the inspiration to make a new cover for our old high chair after seeing this on Make It and Love It.  I actually did this back in July, thinking Max could benefit from a cleaner, comfier chair much sooner than the baby would.  But it was for her, too. 


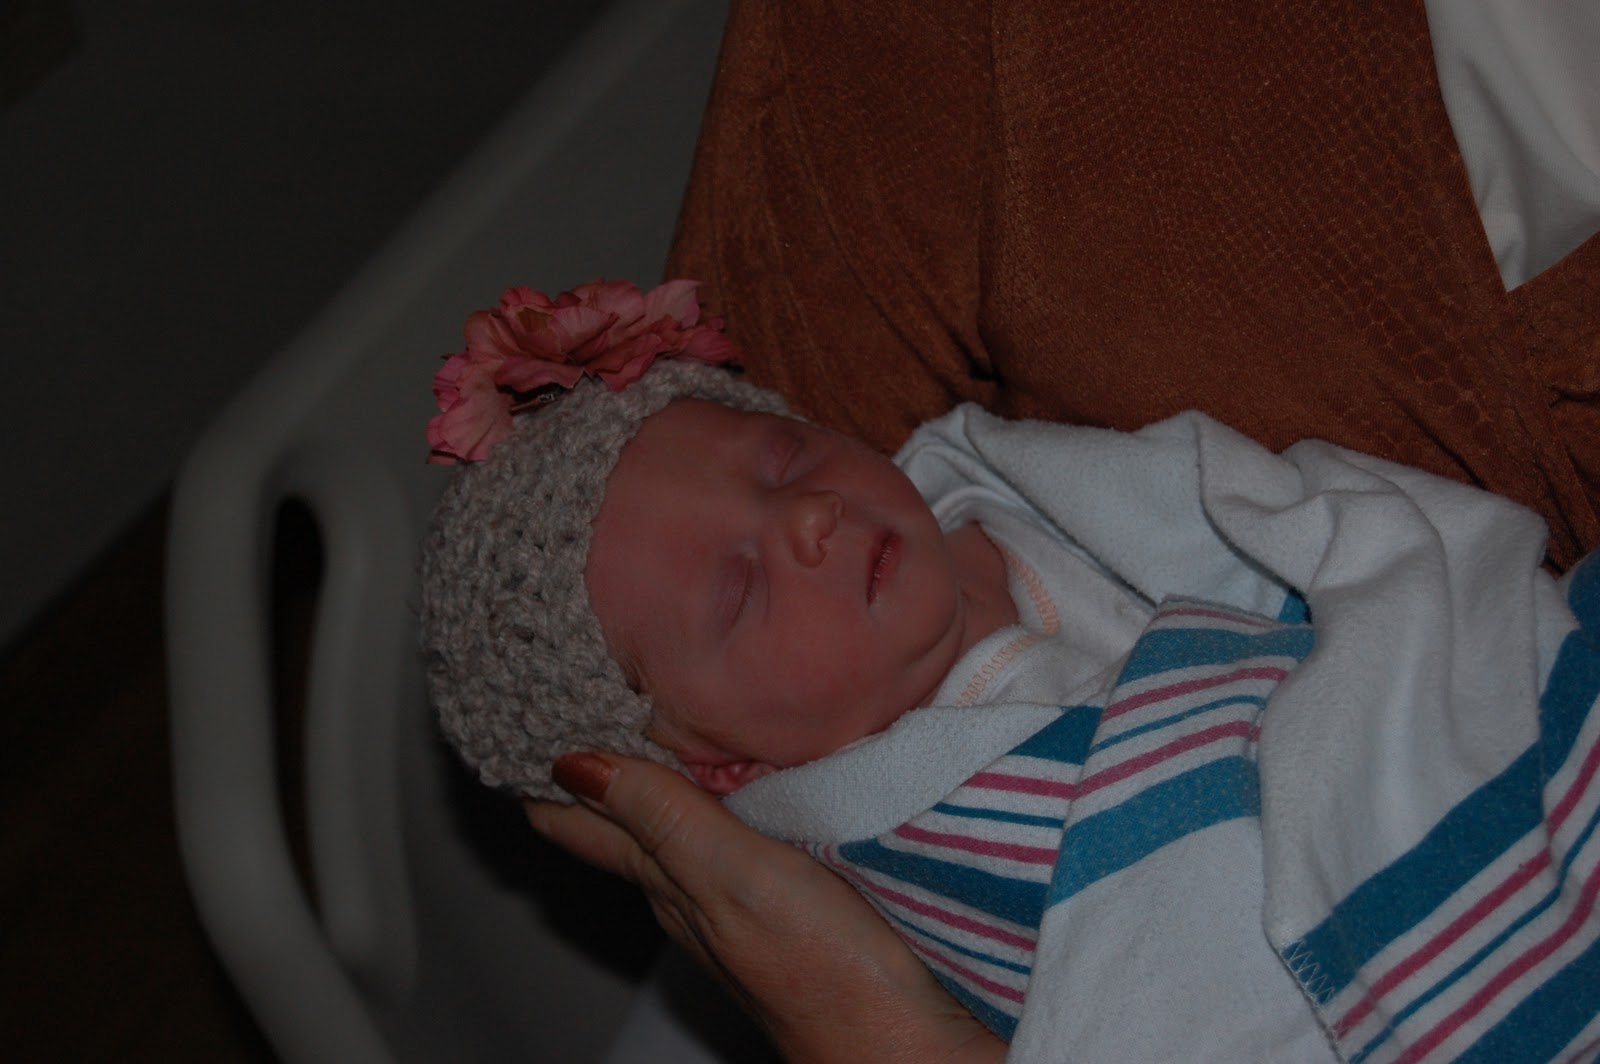
This beanie was born from another nesting project altogether, which I was working on for Lily's newborn portrait session.  I made this beanie practicing the technique (and because I didn't have the right yarn for the other), and liked it so much I decided to keep it.  I had an unfortunate unravelling accident just as we took the above picture at the hospital, and ended up making another one (a little bigger this time), so maybe you'll get to see a better picture of her in it in the future.


I found a tutorial for this headband on A Load Of Craft while searching for instructions on how to make a cover for a boppy (another project that has yet to be completed--if I decide to do it at all).  I had all the components just sitting in my hairbow-making supplies, so I made one while I was working on the next project:


Flower clips (and hair bows)!  Not the best picture of the bows, but Lily in the background makes up for that, right?  I'm not even going to try to post a link to a tutorial on these since most people already do this.  If you don't know how to make them, come to my house, and we'll sit and chat while we hot glue our fingers together.   Why did I make these?  My sweet friend Kelie gave us the most adorable headbands and flower clips (you can see one here).  Most people would have received that gift and just been so excited to dress up their little girl in them.  But I have a sickness.  I saw it and was excited to put them on my baby, and then thought how great it would be to have one for every outfit.  So, I had to make some fresh flower clips (despite the fact that I think we have almost 100 of them already), and I made another headband like it in black.  Seriously, someone needs to stop me. 

Saturday, September 25, 2010

Nesting Project #5: Blankets

You would think that after having a girl, I would have a million baby blankets, but when I went through them I realized they were almost all the little teeny receiving blankets that can swaddle a newborn for a week or two and then are too small.  I had a couple of great ones my mom made, but two is just not enough.  And, I didn't have any warm blankets.  So I supplemented what I had a little (I may end up needing another warm blanket for the car seat, but this is a good start). 

Here's a double-sided flannel blanket I made out of my stash.  I buy up flannel from the $1 table at Walmart when I see it and stash it for when someone has a baby.  But no one has had a girl in a while, so this has been hanging around for almost two years! 

Just an easy-peasy blanket: face right sides together, and stitch around, leaving a small opening to turn.  Clip the corners, turn right side out and press, then top stitch. 

These ones were even easier.  I happened to be at JoAnn when they had flannel at 50% off, which was dangerous.  I bought up a bunch of this because it was so pretty, and made two receiving blankets. 

This one just has to be cut to size (I like mine 44 in by 44 in, great for swaddling for months), and then the corners rounded (I use a small bowl), and then serged.  If you have access to a serger (thanks, Mom!), this takes about 5-10 minutes including cutting, tops. 

Now I have some soft, pretty blankets to wrap Baby Girl in when she decides to make an appearance!

Friday, September 24, 2010

Friday Favorites: Crafting Blogs

You want to know the source of all this crafty inspiration I've had while I've been nesting?  It's this blog that Haley told me about and I have become addicted to: Make It and Love It.  Seriously, fun stuff on that site.  You should check it out.  But don't blame me if you go out and buy a bunch of fabric and start going crazy making stuff! 

Thursday, September 23, 2010

Nesting Project #4: BabyLegs

I saw that Babysteals.com had BabyLegs up today, but of course they sold out fairly early.  At 58% off retail, you could buy 4 pairs for $20--$5 each, plus shipping, which if you have ever bought or coveted BabyLegs, you know is an awesome deal.  But, what if you could get them even cheaper?  For less than $5 and 45 minutes of my time, I made three pair:

Now, I couldn't be as choosy with the cute patterns, but that was only because I was shopping for little girls' knee socks in the off-season.  I did find some cute ones in women's sizes at Target on clearance for $1 or less a pair, and made Katie some leg warmers for dance as well.  This tutorial describes exactly how I did it, although I also clipped my seam close to make the seam less bulky. 

If you're wondering why anyone would want these (I have had two people ask me), here's a link to all the great reasons listed on the BabyLegs website. 

Tuesday, September 21, 2010

Nesting Project #3: Bibs

These maybe should have been posted with the last two projects because they are so small and just use the leftover fabric from those projects.  But with any extra fabric I have I intend to pop out some bibs because they are my favorite type of bib and you can never have too many of them.  I am somewhat impared with sewing around curves, though, so I don't make as many of them as I could if it were easier for me.  So silly, I know, but it's really a problem. 

I totally ripped the design of these bibs off some that my friend LeAnn made for me.  The only reason I feel the least bit okay with it is that hers are so much cuter, better-made, and I would buy them from her to avoid having to make them.  This are a couple that she made for Max: 


See what I mean?  Super cute!  And just the right size to handle the big messes, including Max's uber drool while he was teething.  And, they have button closures so Baby can't rip them off and they don't stick to everything in the laundry like with velcro. 

Friday, September 17, 2010

Nesting Project #2: Car Seat Canopy

It seems like with every baby I have there is the cool new baby product that everybody wants to have--mostly because it's such a good idea and so useful, but partly because it's trendy and a fashion statement.  The hooter hider was it with Max, and it seems like this time around it's the car seat canopy.  I see them everywhere, and there are so many cute variations.  Here's mine:


And, of course, the matching burp cloths:


I used this tutorial at Make-It-Do.com as a basis for mine, although I looked at the one at our local Ace Hardware's craft section for ideas (hence the rickrack).  Here's the tutorial for the flowers on the straps, and I just made covered buttons for the centers.  I have admit that I could have probably bought one off Etsy for cheaper, since I bought the fancy fabric at Quilted Works (at full price, gasp!), but I really love it, and it always means more when you make it yourself, right? 

Tuesday, September 14, 2010

Nesting Project #1: Hooter Hider

Okay, I'm 36 weeks today, meaning I'm on the final countdown.  (And baby is finally head-down, hooray!!)  I have been nesting like crazy for the last few weeks, and I've still got more to go.  When I nest I do a little of the cleaning-things-out, organizing insanity that is so common.  But for me, nesting means sewing and crafting--making things to wrap and dress and cover baby with.  I thought I'd share my maternal insanity with all of you!  I'm not posting these projects in order of importance or even in order based on when I completed them, just at my picture-taking and posting convenience.  If you're interested in how I made something and I don't describe it in enough detail, let me know and I'll try to point you in the direction of a tutorial or explain it myself.  No guarantees, though, I do a lot of just figuring stuff out as I go along. 

So, for today's nesting project, a hooter hider:


and no nursing cover is complete without matching burp cloths (actually, I was having a hard time not making matching burp cloths with every project, but when you have enough burp cloths to last a month without washing, it's time to stop):


This is my favorite hooter hider tutorial.  I have made a bunch of these for everyone but myself, so I've had a lot of practice.  I obviously embellished a little with the ruffle on this one.  It's also double-sided.  The burp cloths are just Gerber cloth dipes from Walmart, prewashed and with a strip of fabric top stitched down the center.  Easy peasy! 

Monday, February 8, 2010

Photog Practice

The photography class I took last week was phenomenal. You can go here and here to check out the instructors' work. I've taken a class before, but I learned more in one hour with Stacia and Kellie than I did in my whole 4-week community ed course.

Today was a beautiful day, so I knew I had to get out and practice using what I learned before I forgot it. Here are my favorite shots from the afternoon.

ISO 1600, f/5, 1/2500 second

ISO 200, f/4.2, 1/800 second

ISO 1250, f/20, 1/250 second
Look at that gorgeous sky! And the beautiful mountain . . . I am so blessed to live in such a beautiful place.
P.S. For some seriously awesome photography inspiration, check out my friend, Cynthia's blog. I look forward to each new post!

Friday, December 4, 2009

Getting in the Christmas Spirit

Being the veritable elf I am, I was all holly and mistletoe this evening as we put up our Christmas tree. Okay, I whined and complained a lot. There's a story behind that. I may blog about it. Or I may choose not to expose that ugly side of my personality, we'll see.

But here is one Christmas decoration that really made me happy, and I made it myself:


I have to thank Haley for telling me about this craft. Knowing how talented she is, hers will turn out gorgeous, I can't wait to see it! She pointed me in the direction of Nanny Goat. Here is where they link you to Eddie Ross, where the idea came from, and here is their finished product.

Saturday, November 21, 2009

What you can do with some fabric, an old foam mattress and a funnel . . .


. . . and some old pressed leaves, dollar store frames, and a screamin' deal at Kohl's . . .


And this was what it was all for:


This is what I've been doing for the last couple of days: getting ready for Baby Curry. Anne and I have had so much fun decorating the nursery! We had the shower today, so there is very little left to do to prepare for him to come, so we are urging him to hurry on his way here!

Saturday, August 29, 2009

Wake up, wake up! It's a bright, big, beautiful day!

If you're a parent of small children who watch/watched Lazy Town, you may recognize the reference in the title of this post. This song has become our family's get-going theme, and it's so bouncy and catchy, you can't help but want to bounce out of bed when you sing it.

Not everyone is bouncing out of bed so easily, however, with school starting. This is a cool idea I found in FamilyFun magazine, and tailored to my kids.

It's a checklist placemat, perfect for solving two of our morning problems in one: milk spatters all over the kitchen table from the bowl of breakfast cereal, and helping our kids to know and do what we expected of them every morning before school. FamilyFun just had a written checklist, but with one emerging reader, and one still learning her letter sounds, we needed something more visual. So, I took pictures of the kids doing everything I expected of them in the morning. That was the really fun part for them.


Then, on the computer I made a checklist out of thumbnails of their pictures next to the written task that they check off as it is done. Then I printed it on a white 6x12 sheet (I found that it would have been better if I'd stuck to an 11 inch sheet, but it was simple to format to fit a 6-inch wide list in Photoshop), and mounted it next to a full sheet of scrapbook paper on poster board. Then I took them to Kinko's and had them laminated. This was the really fun part for me. However, it was more expensive than I was anticipating because you can only use the self-serve lamination for 11x17 or smaller. My placemats were 12x18, so if you're making them you can just make them an inch smaller both ways, or use clear contact paper instead. Stick a Velcro dot at the top and on a dry-erase marker, and you're good to go!


My kids have really liked the placemats and the dry erase markers. Katie loves feeling grown up as she "reads" and checks off her list independently, and it has really helped with getting Isaiah completely ready and off to the bus stop on time.

P.S. If you notice in the picture of Katie above, pointing at the chore chart: yes, we have a chart reminding us to use a chart. I'm a little chart obsessed. I haven't even shown you our lunch chart yet, just wait! My obsession has gotten so bad that when I showed Isaiah the lunch chart he got all excited messing around with it, and then said, "We should make a chart showing us what to put on here!" Yeah, a chart for our chart. He really takes after me. He even wrote a list today of his invented superhero's super powers. Whew, I'm getting jitters to make another chart, somebody stop me!

Saturday, July 18, 2009

Tag Ball

When I saw camo print flannel on the cheap fabric table at WalMart, I knew immediately I had to make something fun with it. This is what I found, perfect for my little boy who loves balls and is my first baby to really get into tags: fingering them, sucking on them, snuggling them. Here's his reaction:

Mmmm, tasty.

Yea, Mom! I love it!

Friday, May 29, 2009

Summer Fun

Do you remember the anticipation for summer? I loved school as a kid, but there was nothing like that last week of school, the anticipation of long, empty, warm days. Days filled with sleeping in, swimming, barbeques, popsicles, sprinklers, and projects. The possibilities were limitless.

We've been out of school for one week already! So far, we've mostly relaxed and treated our time like a long weekend. But this morning the summer fun really began:


I was hoping to post some of the really fun summer project ideas that have captured my imagination, but they are in my current issue of FamilyFun, and I guess they aren't online yet. So you'll just have to wait and see if we get around to doing them.

Here's one fun project I found via Pumpkin Petunia, fabric scrap necklaces, by cakies:


Happy summer, everyone!

Wednesday, March 11, 2009

Beautiful Young Ladies

Today I went with the Activity Day girls to the temple grounds and took pictures. They are all such beautiful girls, and so photogenic! I was (mostly) pleased with how the pictures turned out, so I thought I'd share them with you in a slideshow (because I couldn't pick favorites with the girls, and that's a lot of pictures). Keep in mind that these are completely unedited (I haven't had time to mess around with them yet)--these girls really are this lovely!


After the photoshoot, we went into the visitor's center and watched "A Pioneer Miracle," a fascinating illustration on the importance of obedience, perfect for young ladies these girls' ages (8-11). I hope this, as well as all the other great activities they participate in, helps them to focus on their inner beauty as they grow and become more beautiful on the outside.

ETA Photobucket apparently crops the pictures as it puts them into the slideshow, don't mind the messed up cropping.

Tuesday, February 24, 2009

Sick Day Boredom Buster

So, we're all sick. The snotty, hacking-up-a-lung, runny eyes, headache, sore throat kind of sick. Yeah, everyone but Adam. And it really sucks. It actually coincided with SEPs at the elementary school, so Isaiah and the rest of the kindergarteners had Monday and Tuesday off anyway. But everyone home and no outings because we are infectious makes for a crabby, crazy bunch.

As the kids were getting wild and I was going deaf, I remembered a project I'd seen in FamilyFun magazine, an orange juice carton wallet. The day after I'd read the article I was grocery shopping at WalMart and saw those very cartons of orange juice on sale, so we bought some instead of our usual frozen concentrate, and I had rinsed and saved them for the perfect time. Now was the perfect time! Here are my bedraggled sick children (remember, I'm sick too, and yes, they were playing outside, don't judge me, it's not that cold here) with their creations:


They had a lot of fun putting small coins in through the spout when the wallet was folded up, and they carried them around all day.

If you choose to make one (or more), keep in mind that this is more of a big kid activity. Isaiah could help a little with cutting out the pattern, taping, and tracing. Katie just cut up paper scraps while I made hers. It worked out really well to do them with each kid individually instead of both together because I did most of the work. It was fun to talk quietly and have some one-on-one time. And be sure to score the fold lines well, it makes it a lot easier to fold.


Here's my sick baby (who, by the way, doesn't fall asleep anywhere but the crib or carseat normally) conked out on my bed, sending you "don't get sick" wishes!

Wednesday, October 22, 2008

The Nursery

Okay, it's finally done! There are some blank spaces on the walls, and that is because we're planning to take pictures after the baby's born, and then we'll hang them. Until then, I didn't have placeholder pictures to hang.